How To Plaster A Wall
Date: 09/09/17
With years of experience with in the plastering industry hawk plastering contractors have decided to help people who want to give plastering a go in their homes but don't know, how to or where to start.
Plastering is a skill just like any other trade which takes years of practice to perfect but if you're not looking for perfection & want to just save time and money by doing the job your self then this is the guide for you.
This is our guide to plastering, if you follow these step you should be OK
How To Plaster A Wall - Plastering Internal Walls
 How to Plaster A Wall
Step 1
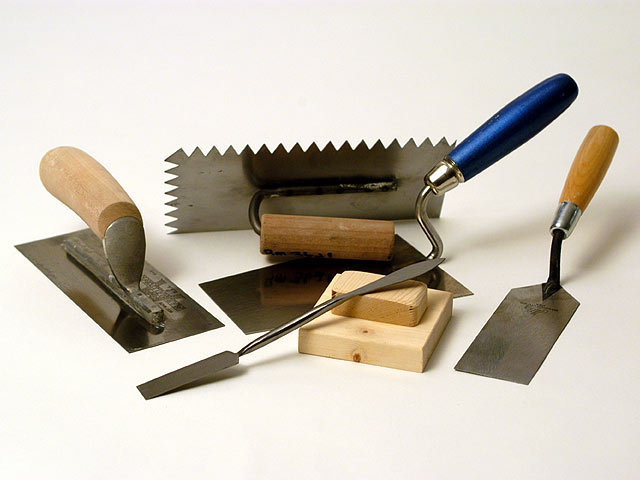
Before you even start you should you have all the necessary tools to complete the job
Tools
-
Plasterers Hawk
-
Plasterers Trowel
-
Mixing Drill
-
6” Paint Brush
-
Protective Sheets
-
Working Platform
-
1 Large Flexible Bucket
-
2 Buckets
-
Bucket Trowel
-
Dust Pan & Brush
Materials
-
Bag of plaster - Thistle Multi finish
-
Skrim Tape
-
PVA Glue
-
Water
-
Plaster Corner Beads
Know you have checked you have everything ready to plaster your wall, it's time to get things ready.
 How To Plaster A Wall
Step 2
-
SETTING UP
Put down all your protective sheets on the floors & any other area you wish to keep clean from plaster also put some protective sheet down where to plan on mixing the plaster because mixing can be messy especially if you have never mixed plaster before.
Then get all your tools out ready where you plan to plaster, set up the mixing drill & the work platform if you can't reach the top of the wall
# How to find a good reliable plasterer
# Plastered Ceiling & Walls Newport
# Hawk Plastering Contractors - Home Page
Step 3
-
PREPPING THE WALL
Inspect the wall first before plastering & ask yourself these questions
1. Is the wall covered in dirt
2. Is the wall covered with dust
3. Are there corners which need plaster beads
4. Are there any large holes that need filling with Bonding Coat
5. Does the wall need a cover of PVA
If you answered yes to there's question here's what to do
-
Dirt & Dust
It is common to have dirt & dust on walls, all you need to do is use a sweeping brush and sweep the walls clean from any dirt & dust
-
Corner Beads
If your plastering a wall which has an external corner you're gonna need a plaster bead, these are available in most d.i.y stores
-
Large Holes
If you have large holes in your wall, you will have to first fill these holes with Thistle Bonding Coats, this is because plaster is only designed to cover large areas of a wall like a full wall or ceiling, plaster does not bond well with small areas which should be filled.
-
PVA
If you are not plastering on plasterboard then the likely answer is yes you will need to apply PVA before plastering can begin
Every little helps - Please like our page
Step 4
-
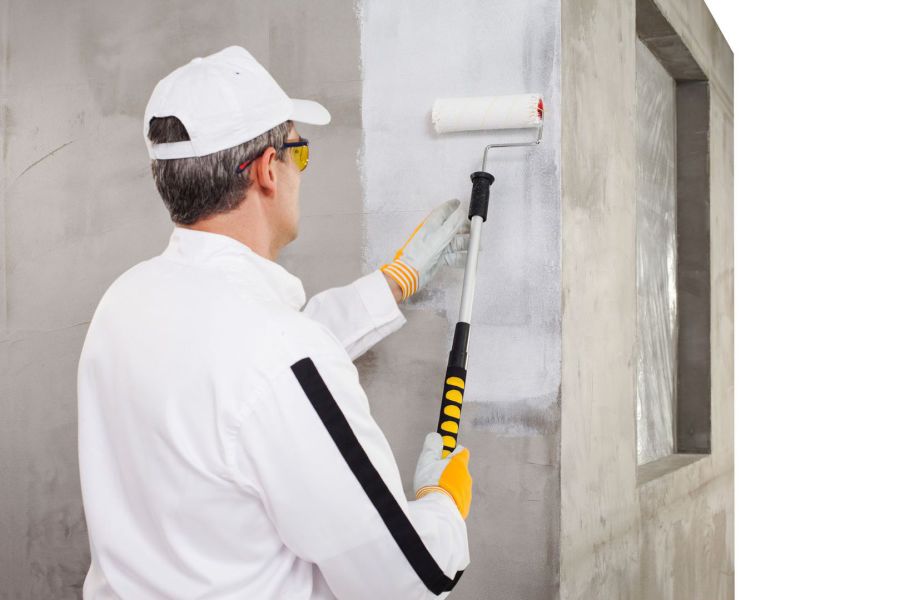
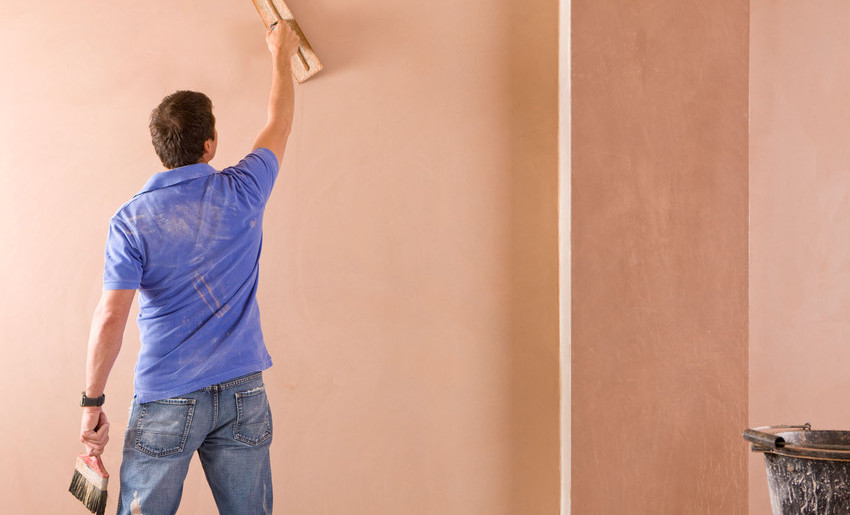
APPLYING PVA
If you're not skimming on plasterboard your most likely gonna need to apply PVA to the wall before plastering can begin.
This is a very important step, Mix the PVA in a large painting tray with 1part PVA and 4parts water, with your paint roller & paint brush cover the entire wall you want to plaster.
Most experienced plasterers will apply PVA & plaster the wall on the same day, However, if your reading this I'm guessing plastering is new to you, so I recommend applying the PVA in 2 Stages for a beginner
Once you have applied your 1st coat of PVA wait until the 1st coat of PVA has dried or put it on the night before and then apply the 2nd coat. You then skim the wall or ceiling when the PVA is sticky, Not wet as it will just drag the plaster.
 How To Plaster A Wall
 How To Plaster A Wall
Step 5
-
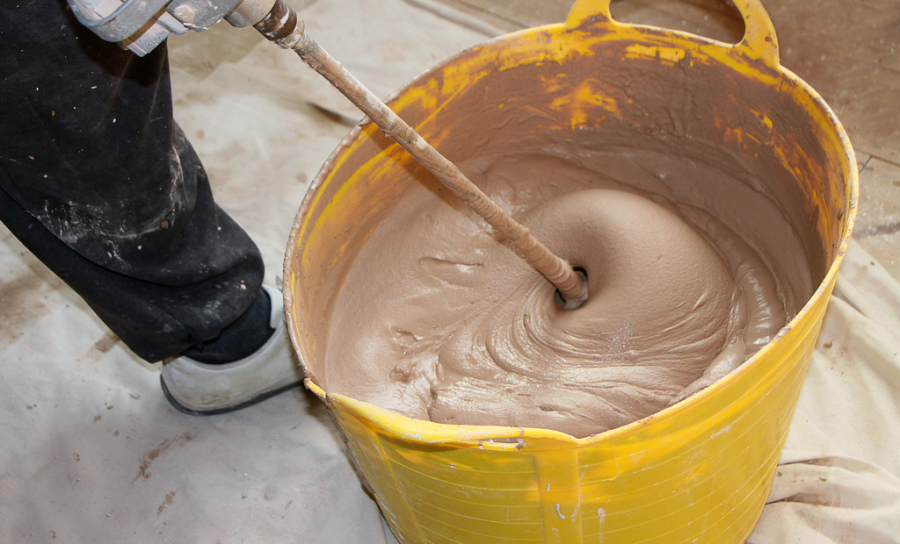
MIXING PLASTER
Fill up a bucket of water almost to the top & pour the water into the large flexible bucket open your bag of plaster - Thistle multi finish using a Stanley knife, carefully pour the bag of plaster into your large flexible bucket with water.
Plug in your Mixing drill and put it into the flexible bucket with the bag of plaster without the mixer spinning, once the mixer is in the plaster begin to mixing it slowly & gradually increasing the speed, move the mixer up & down trying to remove any lumps, make sure to let the mixer get to the bottom of the bucket.
Let the mixer do your work & keep this motion going until the plaster becomes smooth & all the lumps are completely gone, never forget to get your bucket trowel and clean around the inside of your flexible bucket, any dry lumps of plaster on your bucket trowel should be placed in the middle of the bucket & mixed one last time & all lumps are completely gone.
 How To Plaster A Wall
How To Plaster A Wall
Step 6
-
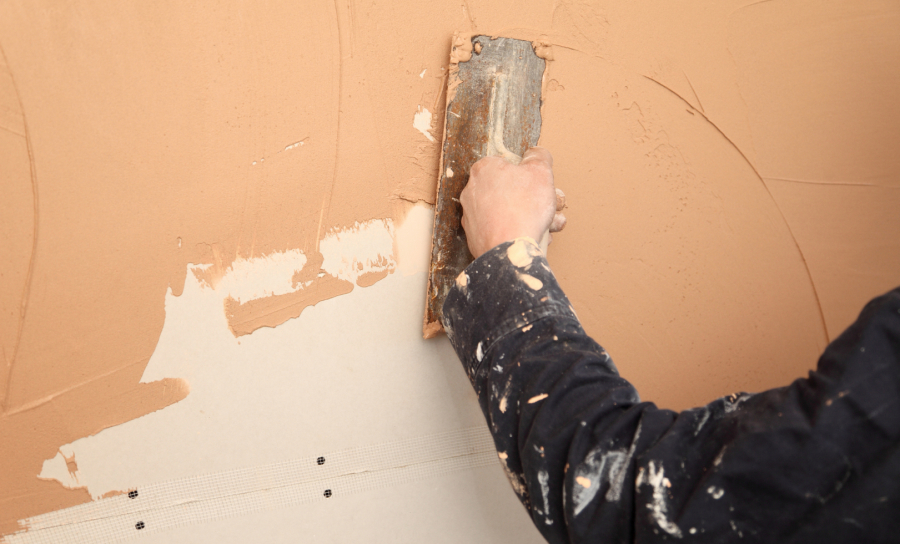
PLASTERING
Now you have applied PVA & Mixed your plaster its time to actually plaster your wall.
With the hawk in one hand & the bucket trowel in the other hand, pick up some plaster from your flexible bucket using your bucket trowel then transfer the plaster from your bucket trowel to the hawk.
Now you have some plaster on your hawk its time to applied it to the wall, pick up your plastering trowel & place the trowel at the bottom of the hawk, as you push the trowel forwards to pick up the plaster simultaneously tilt the hawk towards you until the hawk is almost vertical, once the trowel reaches the end of the hawk flick your wrist back so that the trowel is now facing up which will help the plaster stays on the trowel.
Now put the trowel onto the wall at a 45 Degree angle simultaneously running the trowel up the wall & applying light pressure, Continue to cover the whole wall with plaster working in an, in the same way applying the plaster from the bucket to the Hawk & the trowel than the wall.
Make sure you work as quick as you can as the plaster immediately starts to dry & set from the moment it is mixed, now you have applied your 1st coat it's time to apply your 2nd coat of plaster to the wall.
Repeat the same process as above.
-
Mix Plaster (Unless there is enough plaster left over to complete the 2nd coat)
-
Apply 2nd coat to wall
The second coat is applied the same way with the hawk & trowel, however, this 2nd coat is much more important & needs to be applied thinner than the first 2mm to 2.5mm is what I was told way back when I was learning to plaster as an apprentice, However your just learning & applying the 2nd coat as smoothly as you can is much more important for a nice even finish.
The easiest ways to apply the plaster thinner to the wall is to spread your arm further up the wall than your 1st coat, simply by spreading your arm further will help you apply a thinner 2nd coat.
Once you have applied your second coat immediately go over the wall with your trowel (with no plaster on it). With smooth even strokes with your trowel even out the plaster on the wall, don't over do it here just even out what you can then leave the plaster alone.
 How To Plaster A Wall
Step 7
Step 7 is very important because this will be when the plaster will be at its most workable, leave the plaster to slowly set there is no set time for how long but you can perform a simple rule to see if the plaster is ready.
-
THE GOLDIE LOCKS RULE
For a novice, check if the plaster is ready every 5mins after you applied the 2nd coat by simply pushing your finger into the plaster.
-
If the plaster still feels really wet then it's not ready
-
If you find it hard to push your finger into the plaster then I'm afraid you've left it too long
-
If the plaster is somewhere in between (Your finger mark is left in the plaster but the plaster isn't too wet) then this is just right.
It's time to go over your wall again, this time filling in any imperfections, as you trowel the wall plaster will form on your trowel is excess plaster or (Fat) is what you will use to fill in any marks trowel lines and other imperfections in the wall.
Just simply spread the excess plaster (Fat) over the areas which need filling, do this all over the wall.
Step 8
Once the wall becomes more set, now you have to apply harder pressure to the wall using water, dip your 6” painting brush into your bucket of clean water, now with your wet brush in one hand the trowel in the other hand put the wet brush against the wall.
Water will run down from the brush onto the wall but just before the water runs too far use your trowel to spread the water over the plastered wall, do this over & over again until the whole wall has been completely covered in this way.
Don't forget to apply firm pressure but not too firm as this may cause trowel marks in the plaster the right pressure will come to you with time, the best thing to do is to slowly increase the pressure until the pressure you're applying is the right amount.
If you decide you want an expert plasterer & live in South Wales please contact
Hawk Plastering Contractors
Or visit our Home Page for information
 How To Plaster A Wall
Step 9
The last step in plastering your wall is to apply your final or hard trowel as know in the trade, the hard trowel doesn't need any water & is applied with a dry trowel just like with the other motions you have been doing.
Simply run your dry trowel over the plastered wall up & down at a 45 Degree angle applying firm pressure, where the wall should be completely set.
This final trowel will make the wall smooth in fact if you did this a few time the plaster would end up feeling like glass but this is not advisable because painting the wall may become a problem if the plastered wall is too polished.
Go over your wall once or twice with a final/hard Trowel but no more.
Step 10
The last thing to do before your plastering is complete is to clean up
- Always clean your tools as plaster will dry and become hard to remove
- Sweep up all your bits of plaster that dropped on the floor
- Clean your buckets
- Dispose of any excess plaster that wasn't used
- Put all your tools any
Job Complete
Continue to scroll down to read plastering tips
Hawk Plastering Contractors Our Work
Before:
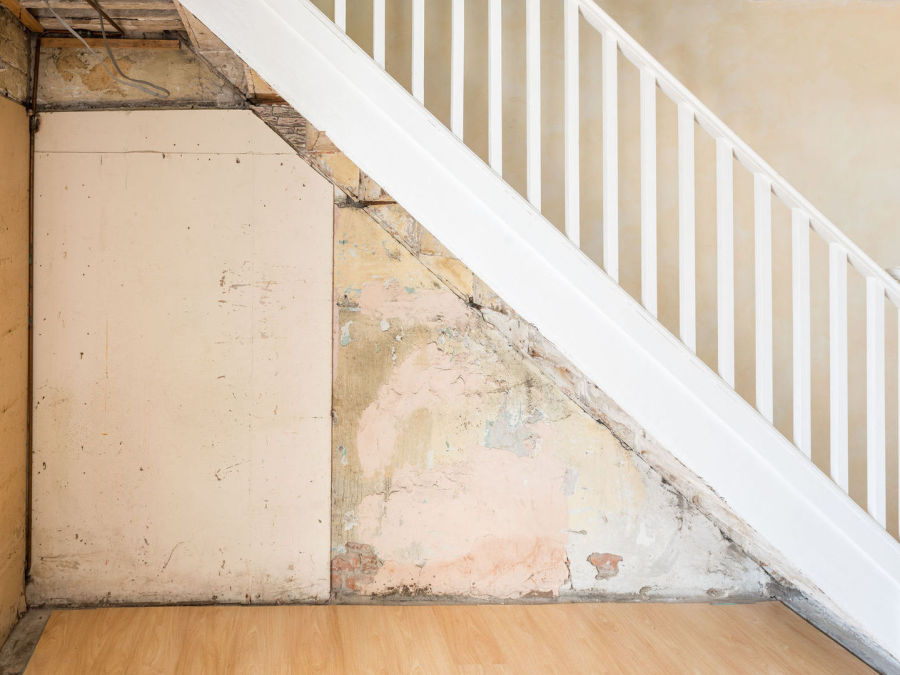 How To Plaster A Wall
After:
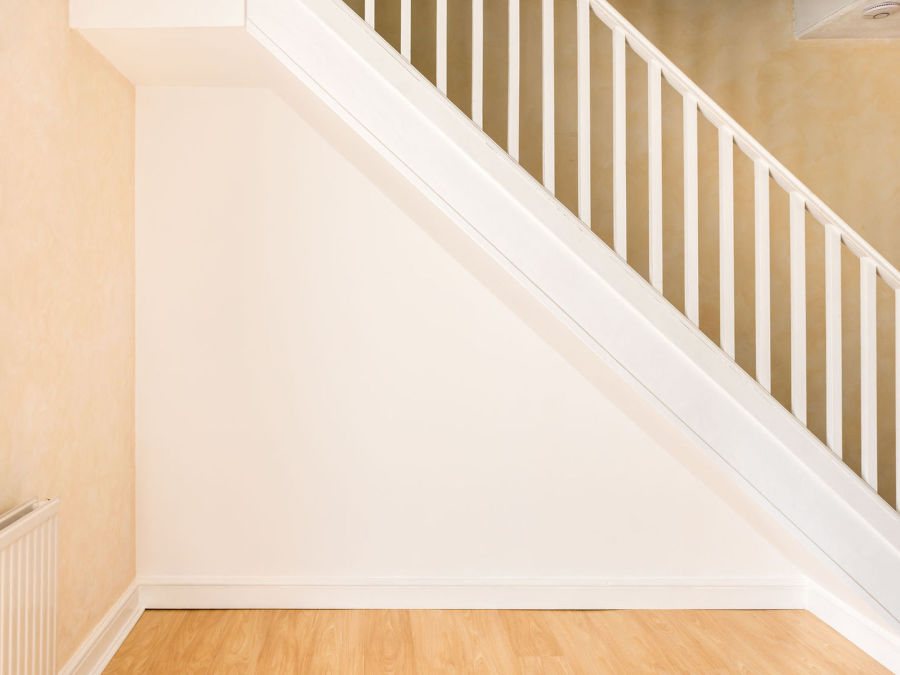 How To Plaster A Wall
Plastering Tips
-
After 1st & 2nd coats of plaster, clean your Hawk & Trowel this will help stop any dry clumps of plaster making marks on the wall.
-
When mixing plaster always make sure the water is clean nothing is in the bucket like dirt or very small stones as this will drag in the plaster when using your trowel & cause marks & lines.
-
If you have skirting boards then cover them with 3” thick masking tape as this will save you time and lots of hard work scrubbing the skirting clean after.
-
Be quick, Don't hang around the plaster started setting from the moment it went into the water, setup be prepared & get it on the wall as fast as you can.
-
If the plaster does dry out to quick for what ever reason, use a sponge float this will help bring back the plaster to a workable state.
-
Remove all the radiators from the walls before plastering, don't try & plaster behind it
-
Skim as close as possible to pipe but getting behind some pipe just can't be done, instead cover the pipes after plastering with PVC or with something else you like.
-
Pay special attention to the internal corners of your wall, this is because the internal corner creates a straight line & if the corners are uneven or wonky this will be easily noticed by yourself & others.
 How To Plaster A Wall
The History Of Plastering
The earliest plasters known to us were lime-based. Around 7500 BC, the people of 'Ain Ghazal in Jordan used lime mixed with unheated crushed limestone to make plaster which was used on a large scale for covering walls, floors, and hearths in their houses.
Often, walls and floors were decorated with red, finger-painted patterns and designs. In ancient India and China, renders in clay and gypsum plasters were used to produce a smooth surface over a rough stone or mud brick walls, while in early Egyptian tombs.....
Comments
-
Lovely Article, is the best iv read online
FFor learning to plaster -
Like your post on how to plaster a wall
Do you think you can do some more on rendering and pebble dash please.
this would really help me
thanks -
Hi
Thank you Sarah for you comments.
i will do a rendering post one day soon & maybe a pebble dash post in the future.
Thanks Alfie
Its always nice when some likes your work.
Site Map: